I felt like sharing some pictures about how I made Haku (from Spirited away) dragon figure.
First as you can see I wrapped some tape around itself to seek the basic structure of the dragon's body. Looks like a seahorse! ;D
When I felt I was ready to figure out some lines for the legs I put some wire in right places to present legs.
Now I finally get to the longest part what is shaping overall shape and muscles with oven baked polymer clay. I usually use Super Sculpey's grey or original (beige) clays.
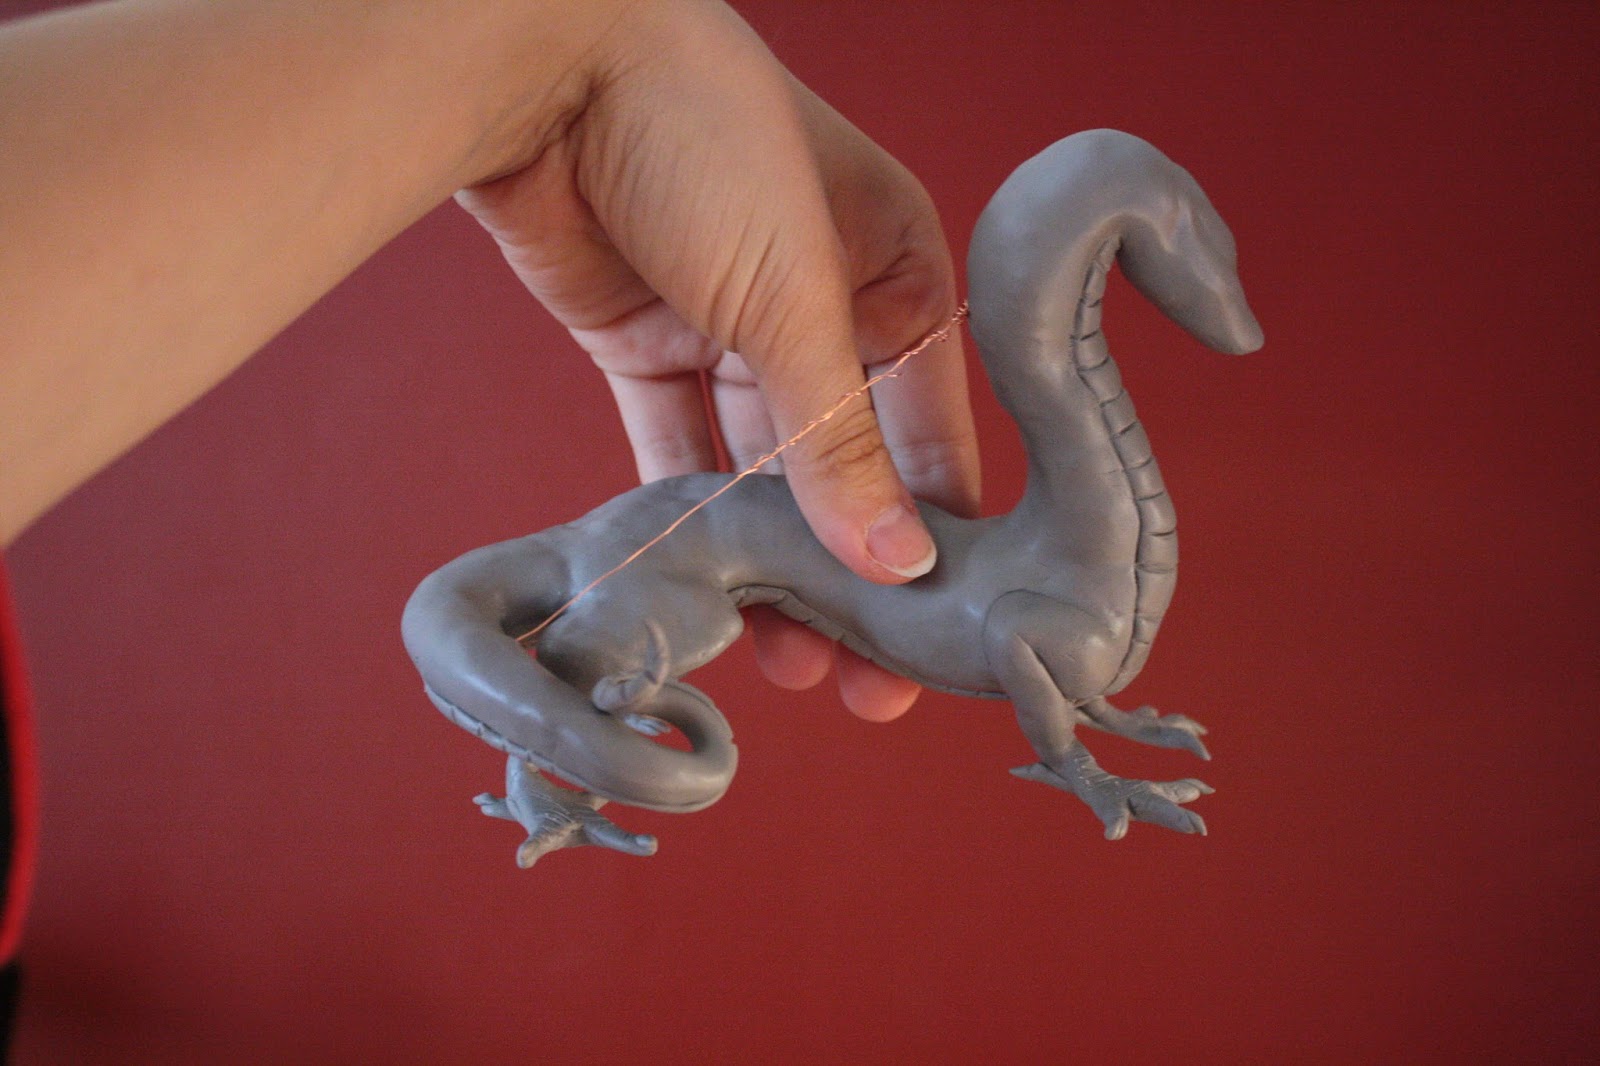
In this case the dragon's upper body and head are so heavy I needed to make some supportive structure. The wire is placed from neck to tail.
When I get muscles in place I smoothed them with my fingers. It's easier to smooth when your hands are little bit warm. (my hands are always so freaking cold so I need to knead polymer clay more to get it smooth to bend).
Because Haku has this scale shape I made it with art knife.
After that came the tiny legs. (What was holding the huge amount of pressure...)
This is how the dragon looked from under. This is also when I baked the dragon in oven first time.
Side profile. Still quite basic looking.
Little bit detailing the face area. I made holes for the little things like ears and horns. That way I can make them to be separated. This of course isn't needed if you are planning to make only one figure and not to make molds for mass producing. Making more details to the dragon was easier because I baked the basic structure before it.
Damn long and tiny whiskers! (I dunno how I can mold and cast those....). Haku's long hair(?) is also added in basic form.
For a finishing touch I made Chihiro to ride Haku the dragon. The girl's tummy is hollow so it can be remewed from Haku if wanted. Lot of sanding with Dremel and sandpaper was used in progress to get nice surface. After this stage will be mold making, casting and painting. Let's see when I get to it.... Hope you liked to follow this progress!